Windermere to Orrest Head walk
09th September 2025
A walk to Orrest Head, starting near Windermere railway station. There is a choice of routes up to the summit. Some routes avoid steps, however all routes include steep sections.
One of the walks I went on this summer was a short walk from Windermere railway station to the summit of Orrest Head. Orrest Head is a hill that was loved by explorer Alfred Wainwright.
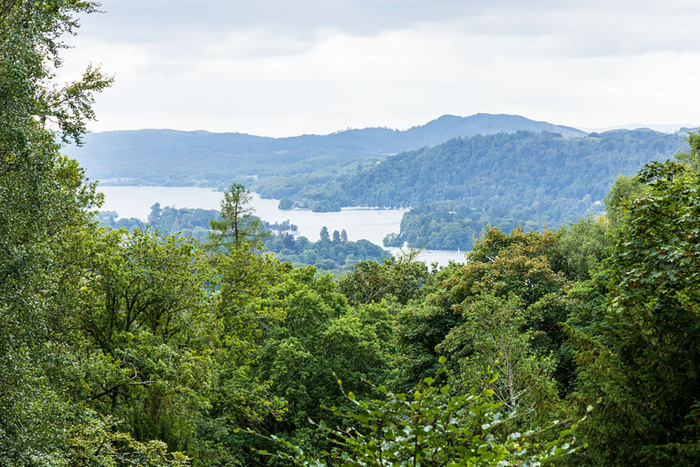
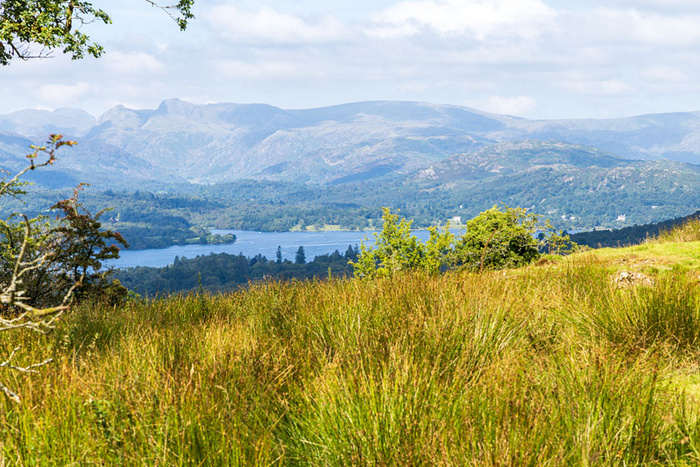
On the walk there are glimpses of Windermere through the trees, then at the summit there are extensive views (weather permitting).
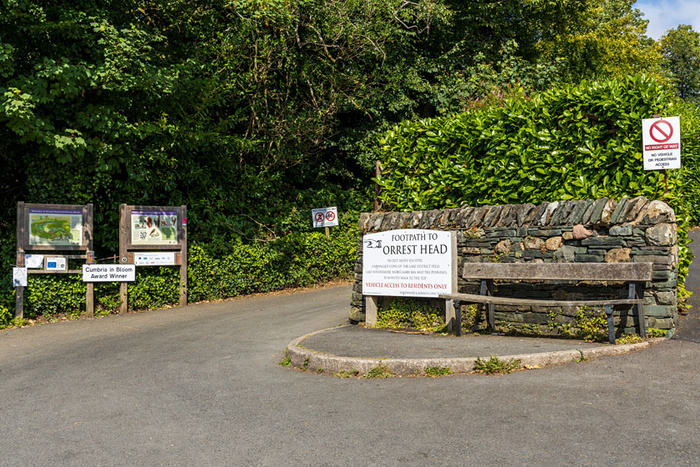
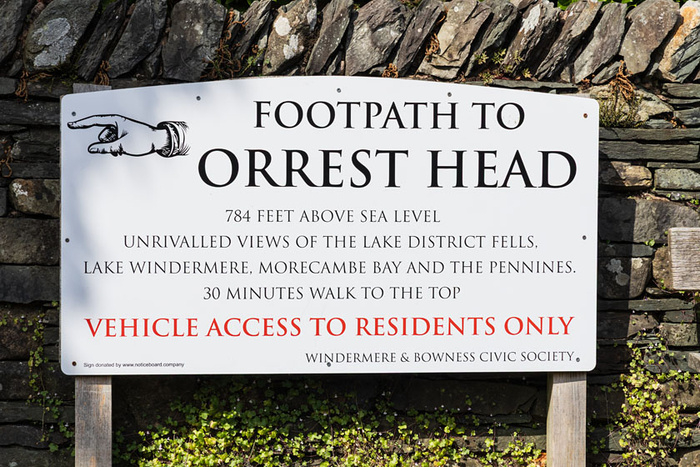
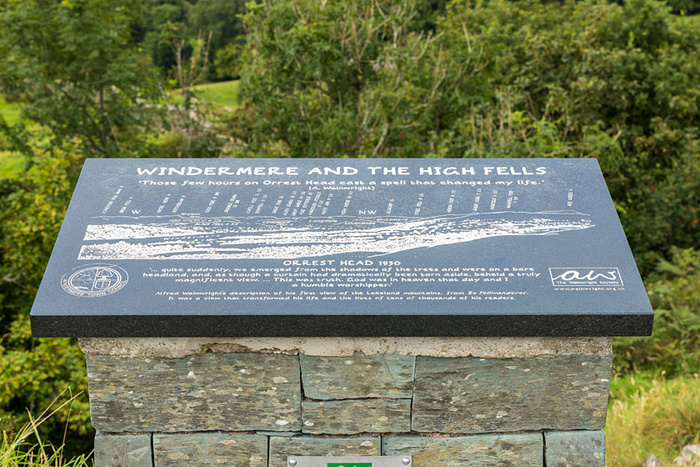
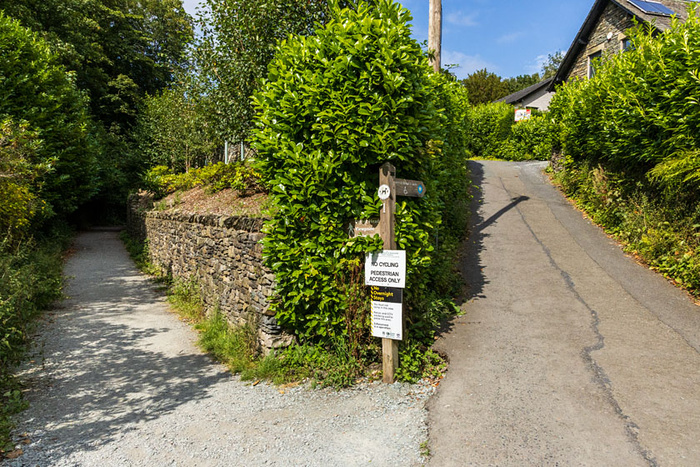
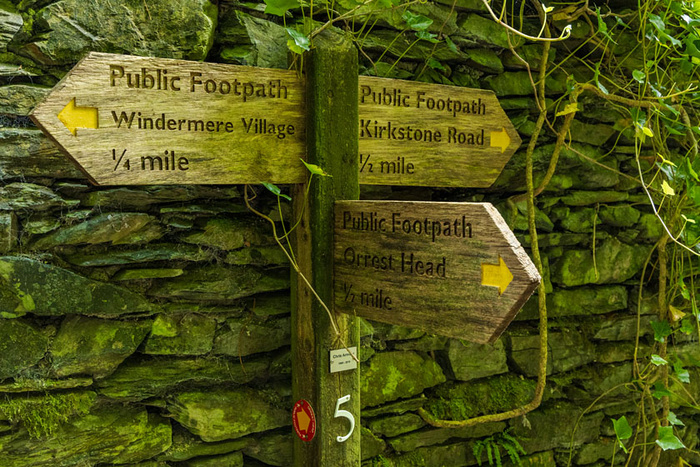
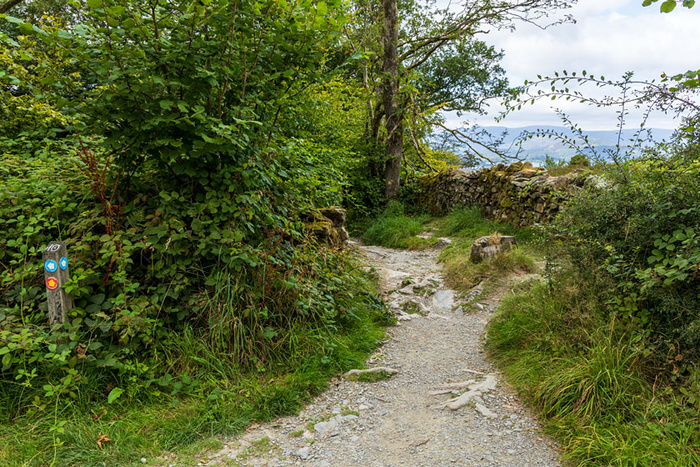
Some signage at the start of the walk, in an area by the side of the A591 near Windermere railway station.
This board shows various routes to the summit.
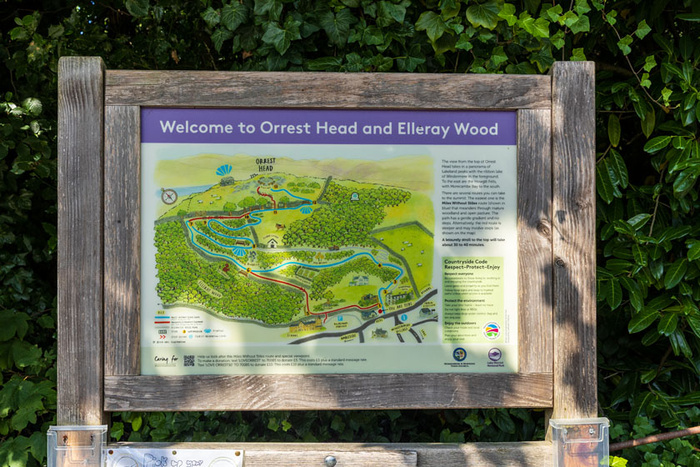
The blue route is the “Miles Without Stiles” route. I saw people with a pushchair at the summit, however I did not see any wheelchairs up there. All the routes have steep sections, even the Miles Without Stiles (blue) route, although the blue route has gentler inclines than the other routes.
There is a section marked grey on the map (from the start of the walk up to signpost 8); I am accustomed to incorporating this grey section into my walk because it was the way that I chose when I first walked up to Orrest Head about fifteen years ago. The blue route with the more recent additions does make for a leisurely meander through the woods though.
The red routes incorporate steep sections and steps. The red routes were relatively busy when I walked them on a summer’s afternoon this year, however some people were indicating that the red route was tiring for them.
There are so many route combinations possible (subject to suitability such as weather conditions) that showing all the routes in depth pictorially would make for a very lengthy blogpost, so I will be concentrating on showing some scenic parts of the routes and trying to illustrate some of the character of the area. I visited on a hot dry day when I was happy to try all sections.
This is not a walking guide and I have not shown all sections.
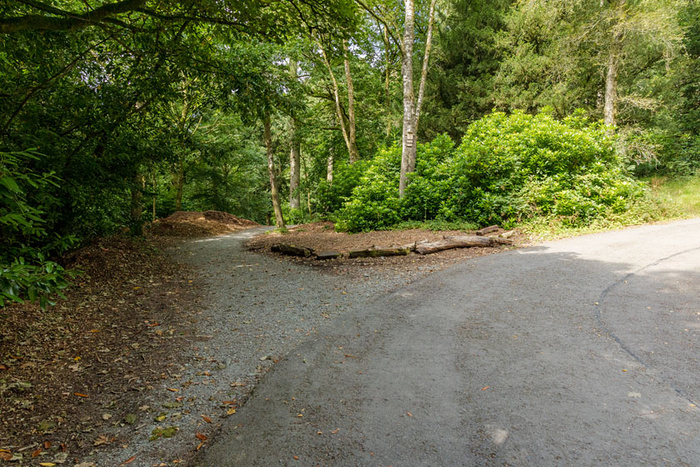
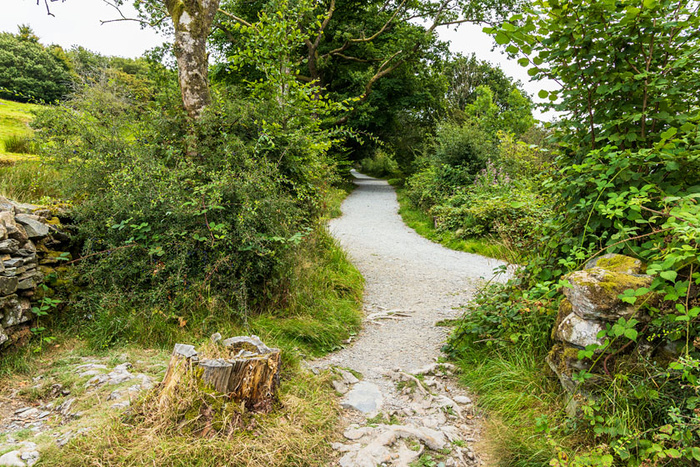
The blue route (gravel path) between signpost 4 and marker post 6
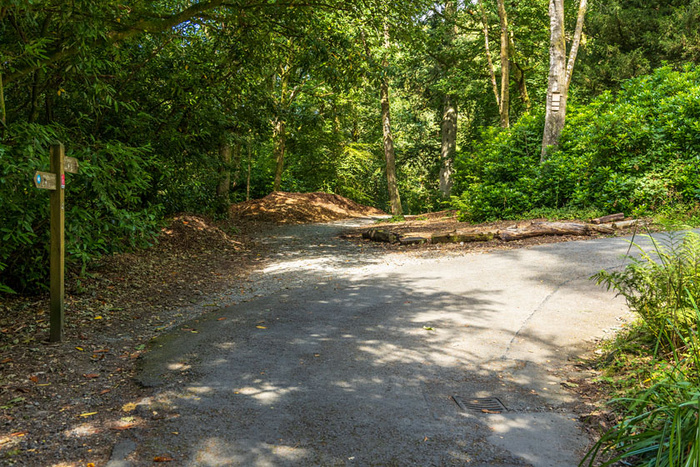
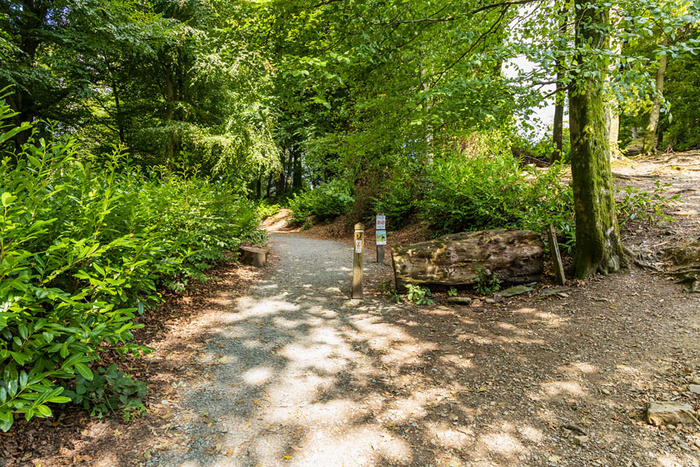
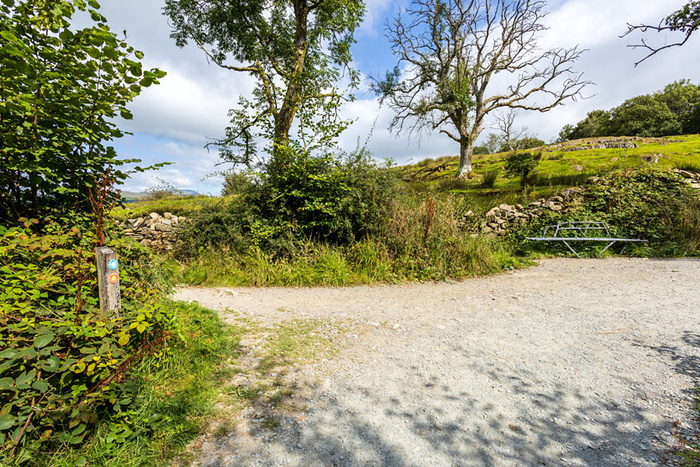
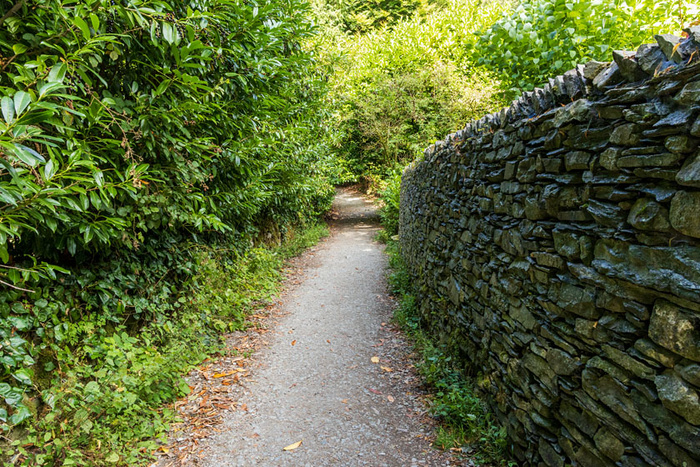
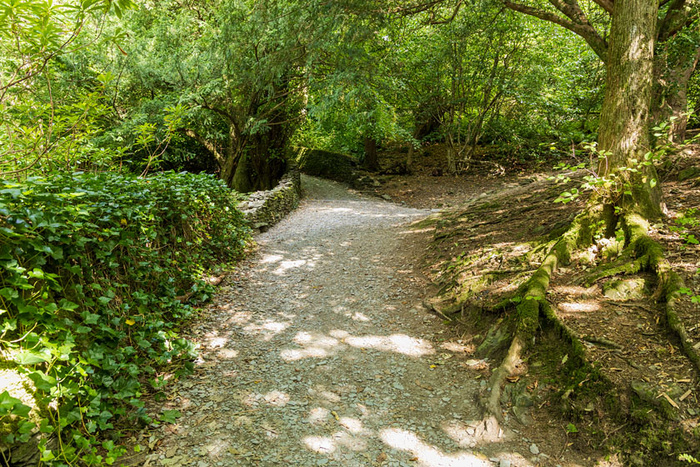
In this area, which is in the vicinity of signpost 4 (the signpost is off to the left side of this image, not shown on the image), I have been accustomed to continuing to walk on the Restricted Access road (which curves to the right uphill in the lower right of this image) i.e. I usually take the grey route. Now however, there is the option of taking a gravel path blue route leading from near signpost 4 to marker post 6; the blue route can eventually lead to the summit, however it is a leisurely and meandering way to get there. The gravel path is initially approximately level but actually goes downhill before it reaches marker post 6, then the blue route path to the summit goes uphill from marker post 6.
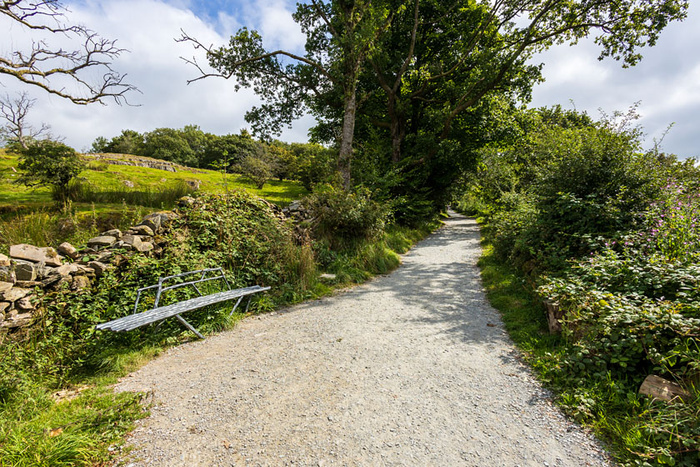
On the blue route gravel path between signpost 4 and marker post 6.

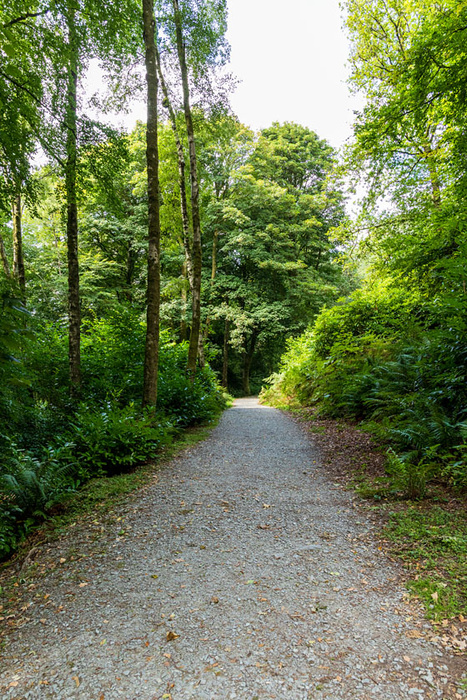
On the blue route.
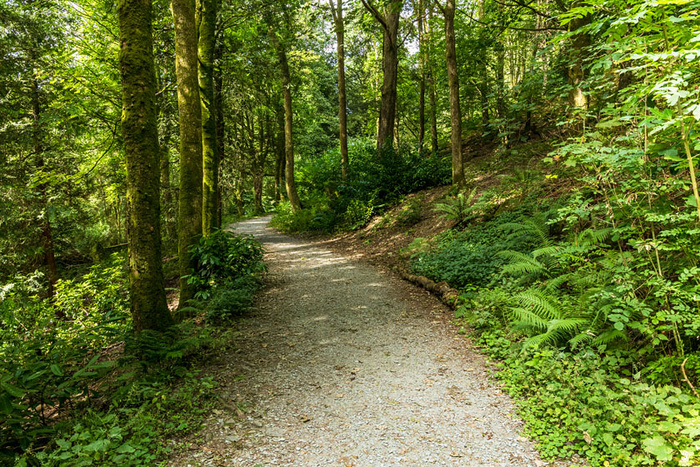
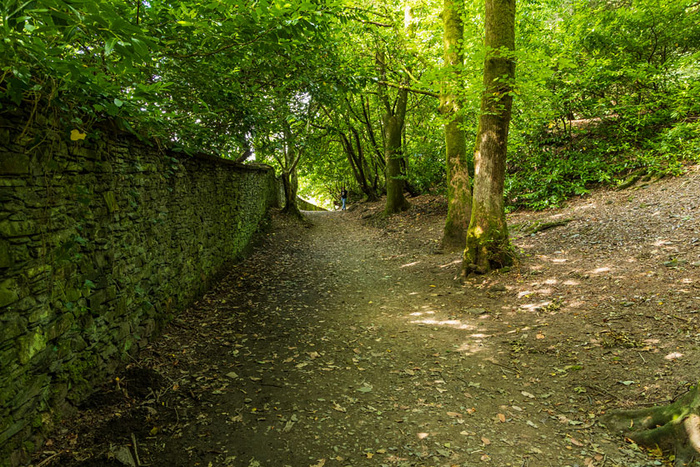
I was impressed by the grandeur of the tall trees on this stretch of the blue route.
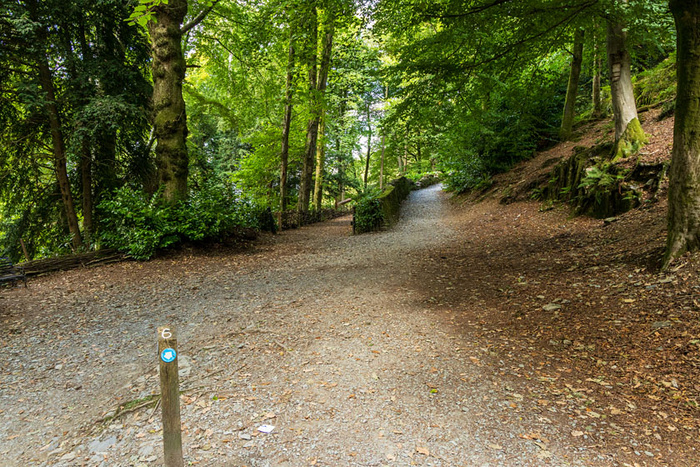
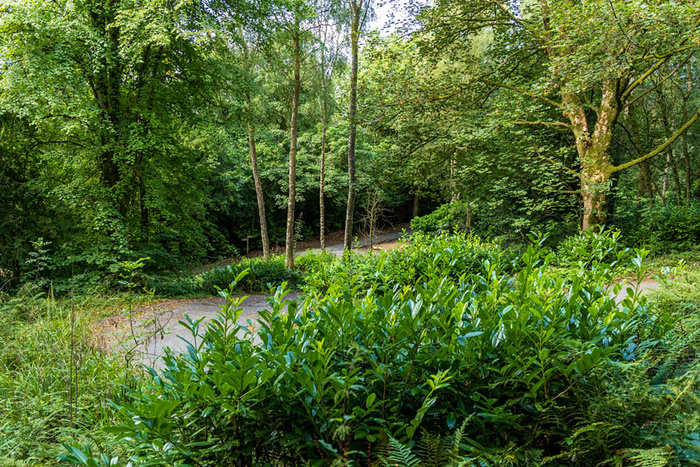
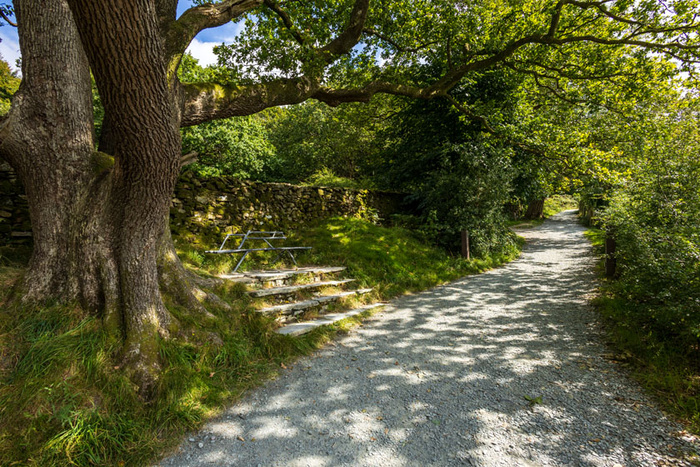
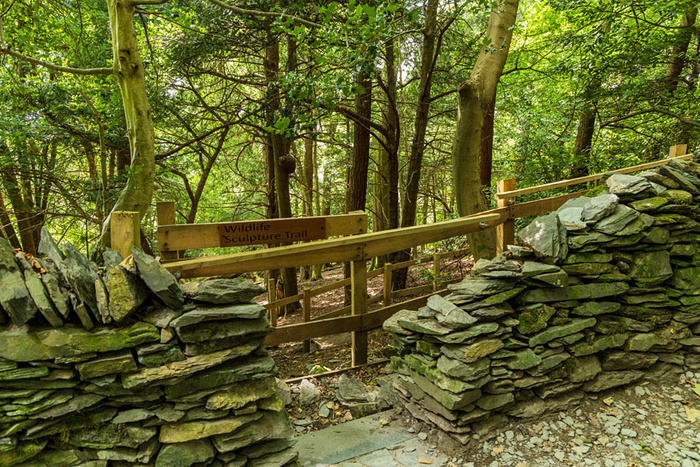
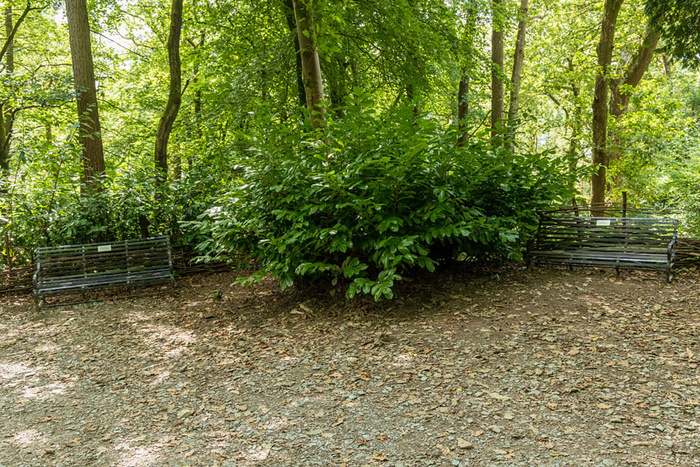
Several paths meet in the area by marker post 6. Off the bottom left of the image is the red route which comes uphill from near the start of the walk. There are two benches; people who have walked up the steep path from signpost 5 seem especially happy to sit on the benches. Looking ahead, there are two path entrances next to each other (in the top half of the image); the path entrance on the left is for the Wildlife Sculpture Trail whereas the path entrance on the right is for the blue route that leads uphill to marker post 7 and then continues to the summit.
Around signpost 8
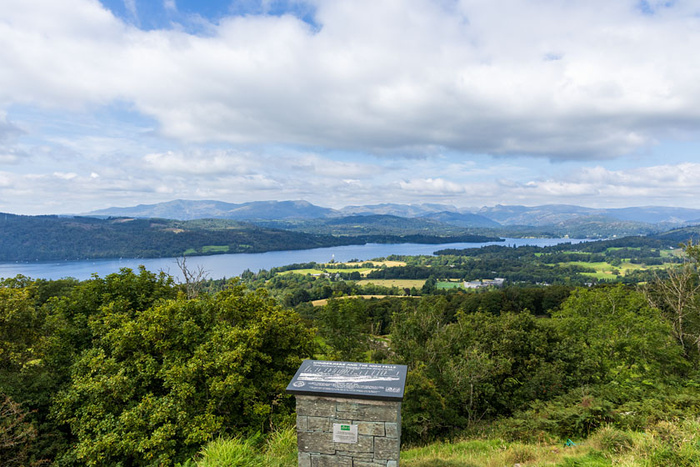
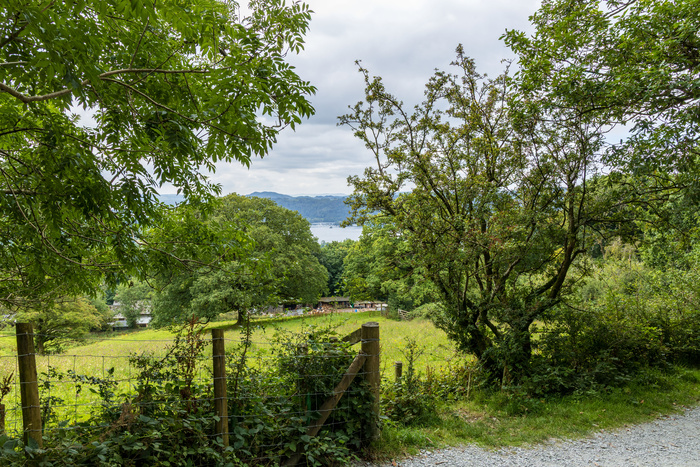
Halfway up the hill is signpost 8. It is a popular place for people to rest before they continue their walk; there are several benches in the area and there is also map signage. There is a lovely view of the lake through the trees.
A view from near signpost 8 which is halfway up the hill between the start of the walk and the summit.
There may be some wooden sculptures visible in the area near signpost 8. (The area designated as the Wildlife Sculpture Trail / red squirrel conservation area, however, is near marker post 6; I have been preparing photographs of that area towards a future blogpost).
There may be some refreshments available to purchase in the area near signpost 8, subject to opening times etc.
It seems great that next to the railway station, near the start of the walk, there is a Booths store which appears to have convenient opening times, a wide range of food to purchase and also has many tourist information leaflets. Windermere Tourist Information Centre (next to Booths) also has many tourist information leaflets.
On the day of my walk from near Windermere railway station to Orrest Head this summer, I also walked down to Broad Street in Windermere town and then back up to the railway station. There is a car park at Broad Street and there are some toilets there too. It took me less than ten minutes to walk up from Broad Street to the railway station.
The grey route option from signpost 4 up to signpost 8
I am accustomed to walking the grey route, however there is now a blue route available and the signposts no longer point to the grey route between signpost 4 and signpost 8.
Reaching signpost 4 after walking uphill on the blue/grey route. The grey route goes uphill from here; the Restricted Access road curves round to the right, coming off the middle right of the picture.
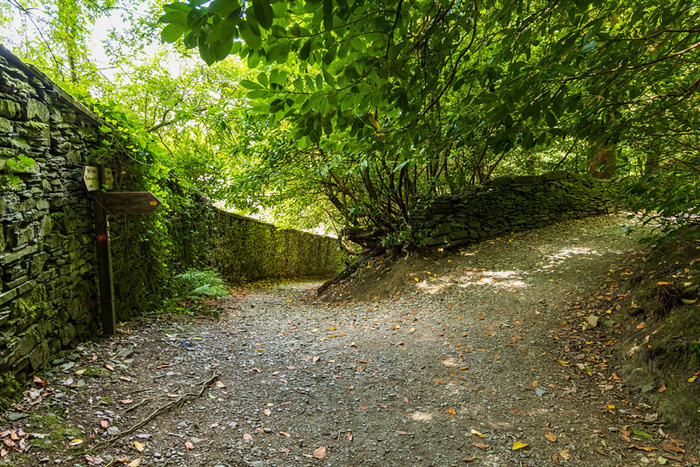
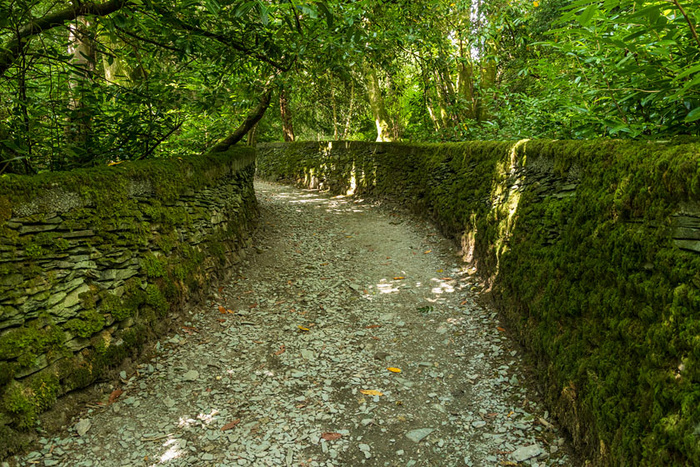
On the grey route between signpost 4 and signpost 8, there are some bends that seem like chicanes. The Restricted Access road ascends quickly; the route is narrow and the bends here are tight. This image is a view looking back downhill after I had just walked uphill from signpost 4 which is just visible in the distance.
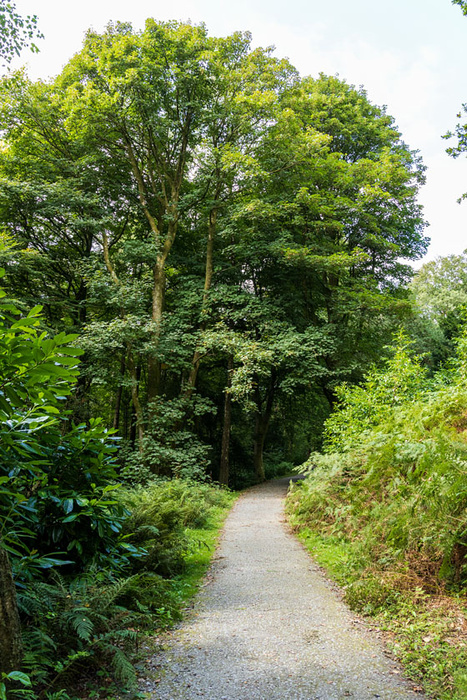
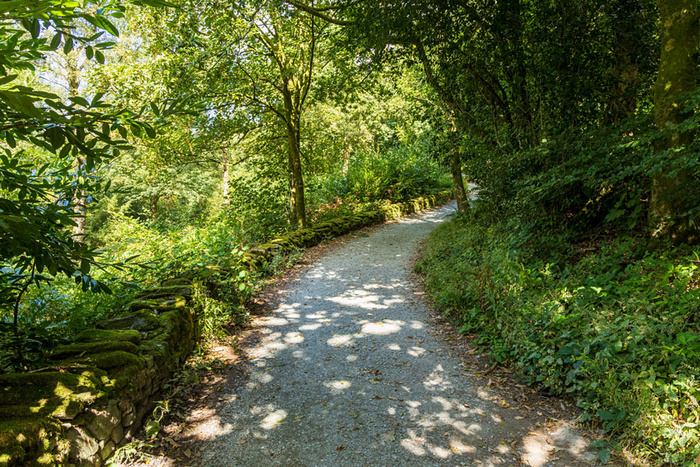
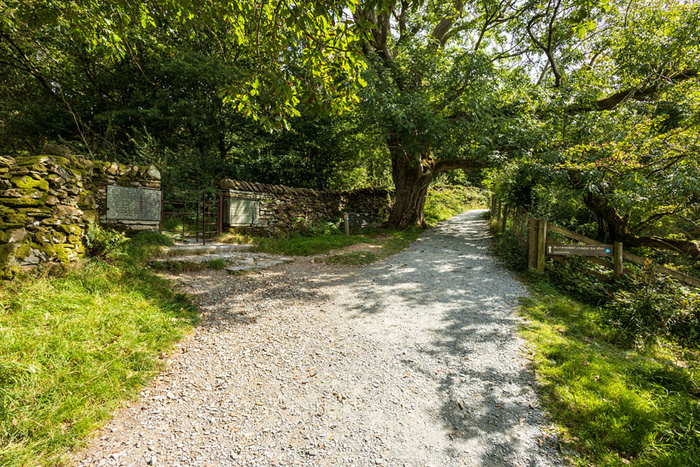
The grey route passes Elleray Wood Cottage and the blacksmith’s studio and winds its way up towards signpost 8.
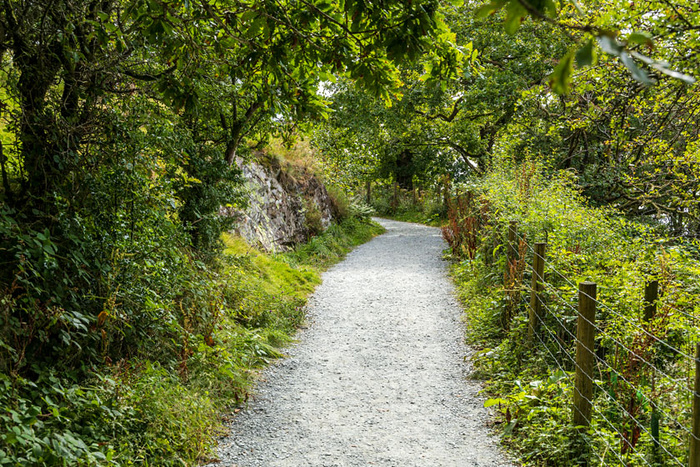
A stretch of the grey route, shortly before reaching signpost 8.
From near signpost 8 to the marker posts 9 then up to marker post 10, via the blue route
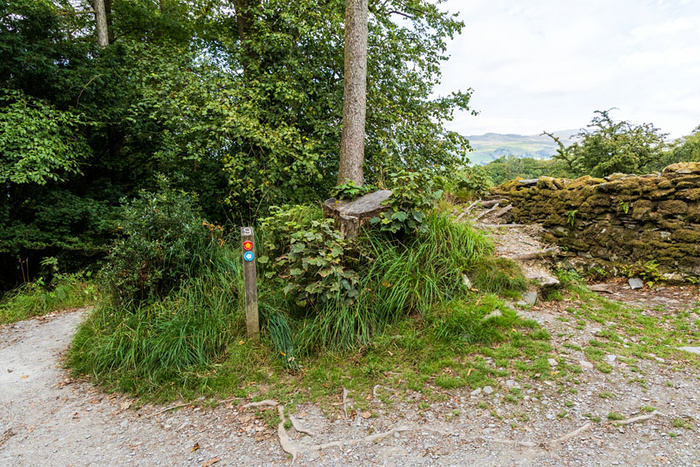
After passing by signpost 8, I walk further uphill, on the path to the left of the posts in this image. I am glad that a path has been laid here (rather than having to find a way across tree roots).

The blue route curves around to the right as it continues weaving its way uphill. Coming off the blue route path in this area are two red routes: a red route goes downhill from 9 to 7 off the left of the picture, while a red route goes uphill from 9 to 10 (three people in the shade here are walking on the red route between 9 and 10). The marker post on the left is one of the marker posts marked 9; there is another marker post (also marked 9 but not included in this image) just around the curve to the right.
Reaching marker post 10. The blue route path curves to the right to continue going uphill. (Marker post 10 is visible on the left of this picture; the post indicates a choice of routes for anyone walking downhill. When looking over the stone wall to the side of the red route, views looking across Windermere [including part of the lake and distant fells] can be observed; I show some of the images later in this blogpost).
From the metal bench near marker post 10, up to marker post 11
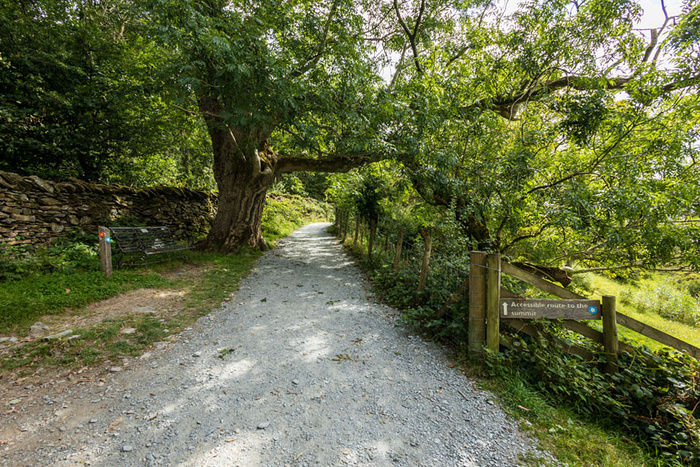
Looking uphill from marker post 10, with the path stretching ahead into the distance. This path is a blue route; I consider that the path allows for a pleasant walk up to the summit from here. The incline seems quite gentle and there are benches by the side of the path.

The blue route continues straight on up the hill here, via the gravel path which has a gentle incline (right-hand side of the picture). There is a wooden sign which says “Accessible route to the summit”. (An alternative route is available, a steep red route, by walking through the kissing gate on the left and climbing a multitude of steps and ascending a rocky area to the summit. This alternative route is shown at the end of this blogpost).
From marker post 11 to the summit approach
Marker post 11 is next to the metal bench, on the left of this image.
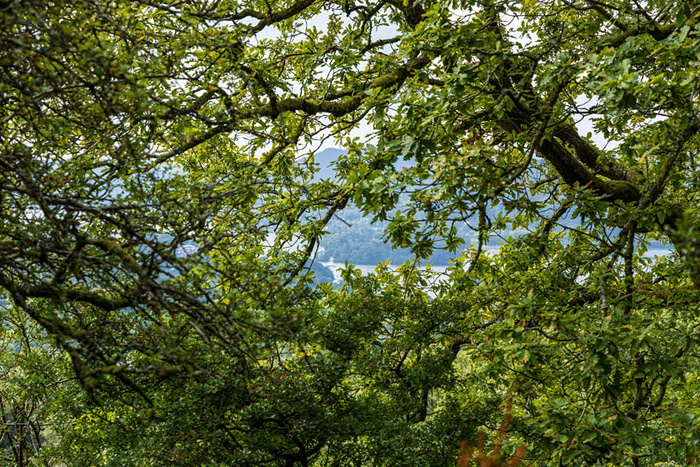
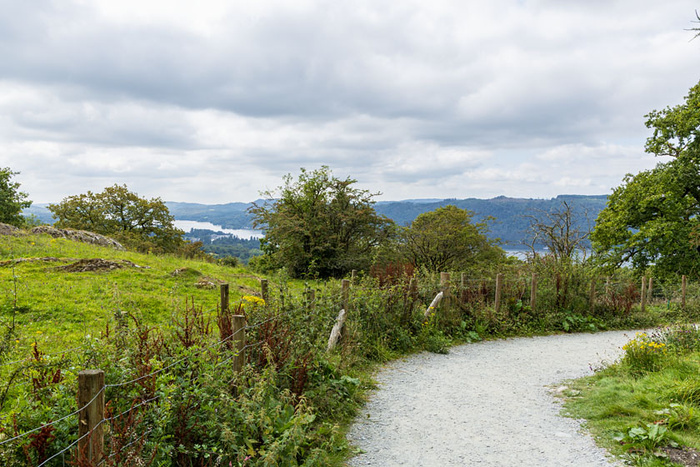
From near marker post 11, a view of Windermere can be seen through the trees.
Continuing on the blue route that leads gently uphill to the summit.
Marker post 12 is on the right of the path. The path curves round and gently winds its way towards the summit. It is not far to the summit from here.
Approaching the summit which is just in sight ahead.
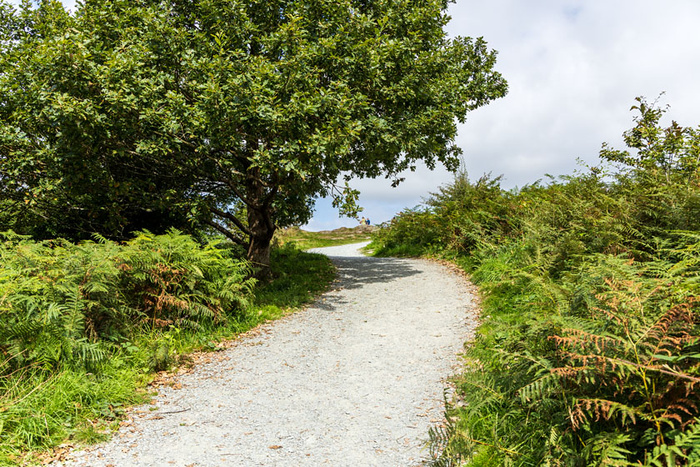
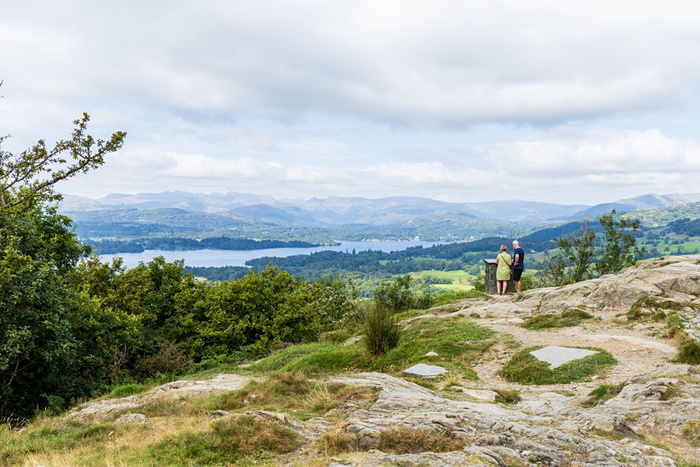
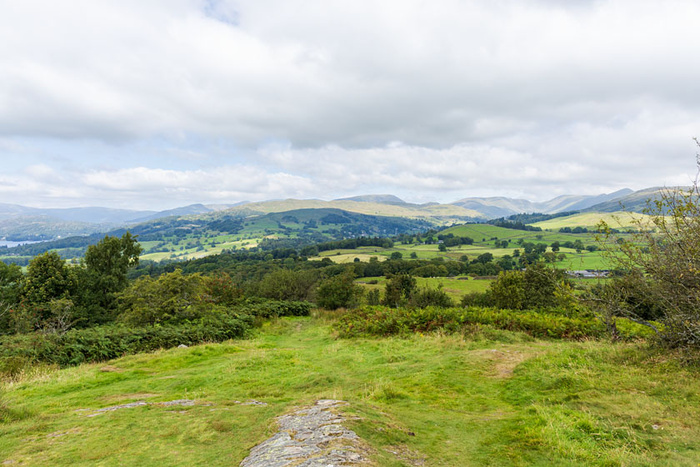
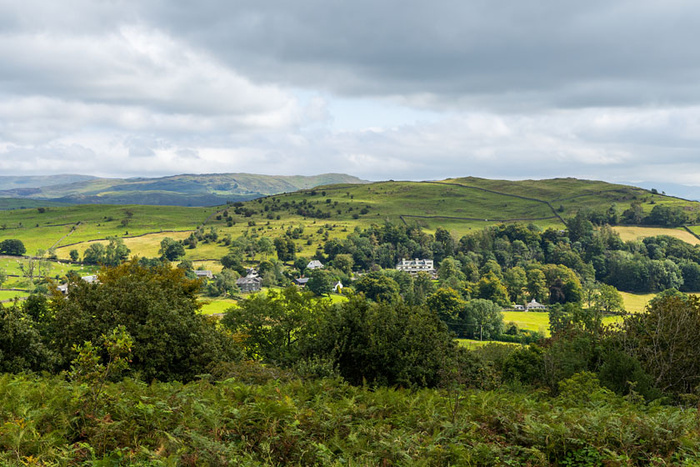
The summit area
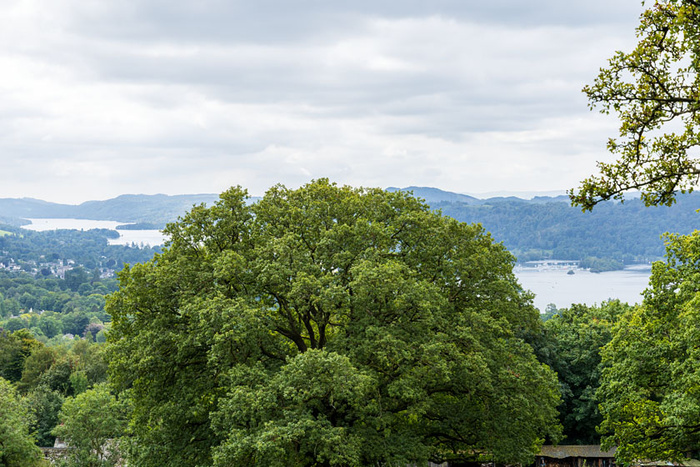
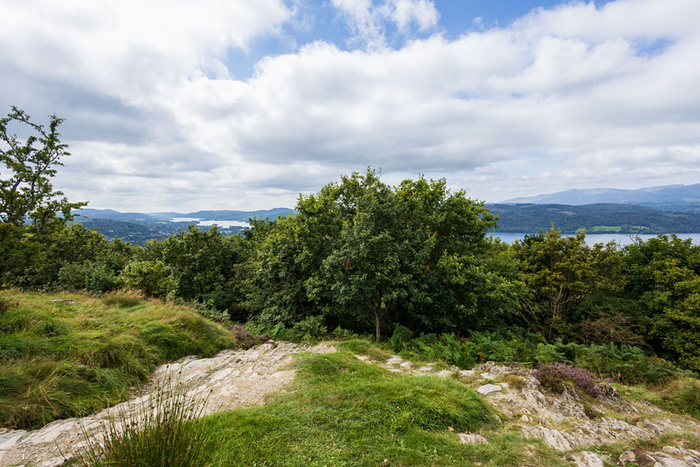
There were lots of people sitting and standing around at the summit on this occasion so I couldn’t capture a photograph of the summit seating area without people. I was able to capture scenic views in all directions, although the conditions looked a little hazy in the distance.
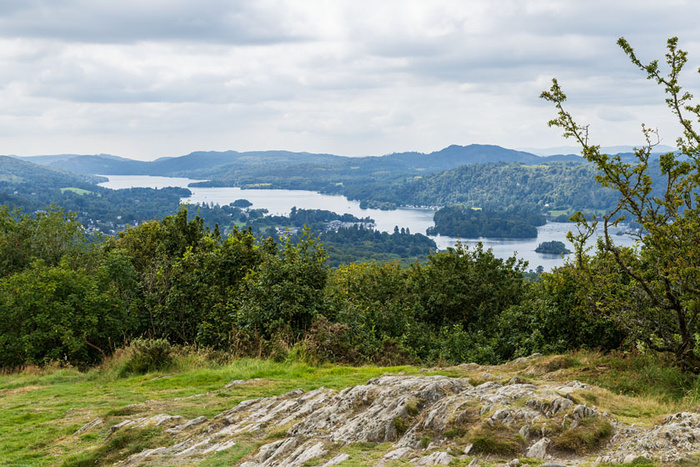
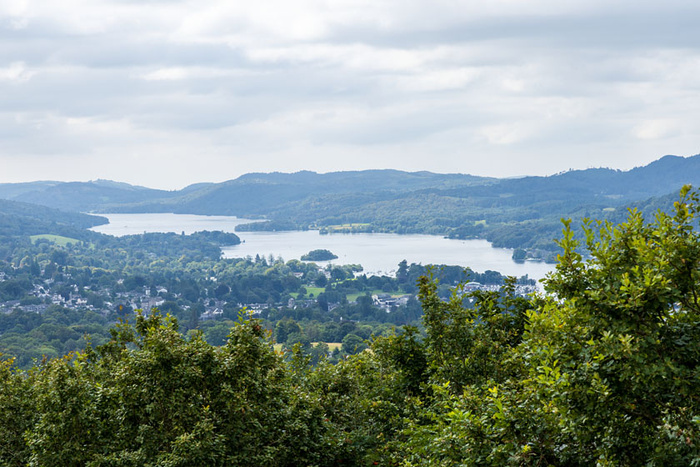
Walking down the blue route path after leaving the summit
The next images are after I left the summit. (I noticed the views through the trees more on the way down).

THE RED ROUTES
Signpost 1 to signpost 5 then up to marker post 6
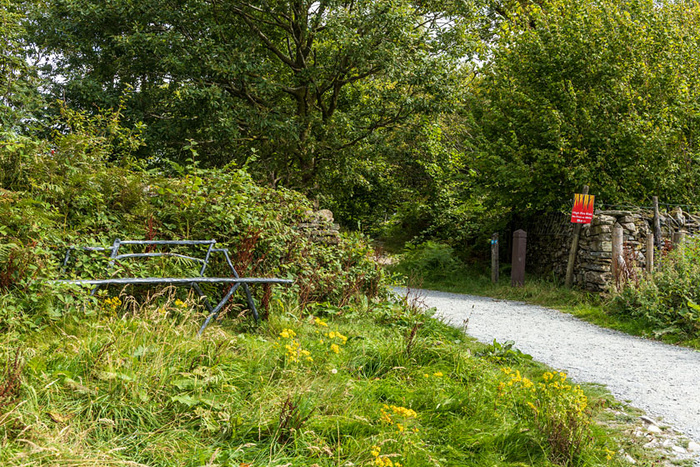
The path on the left is the red route from signpost 1. The weather is hot and sunny; the path soon goes into shade. It is quite a busy route (I saw lots of walkers, many with dogs) although I found it quite dark.
Signpost 5 is on the left of the image, near the wall. I turn right at the signpost so as to continue on the red route. The red route gets steeper from this point; the path from signpost 5 up to marker post 6 is quite steep.
Signpost 5 indicates the route for Orrest Head so that walkers know where to turn for the route up the hill.
People/families with dogs seemed to be taking this route in their stride and it seems probable that those people go walking outdoors a lot, however people without dogs were indicating that they found the uphill walking on this red route to be tiring.
An entry/exit point to the Elleray Wood Wildlife Sculpture Trail can be seen at the side of the red route path between signpost 5 and marker post 6. The sculpture trail is steep and narrow and has steps. (There is a wider entry path a little bit higher up at marker post 6 so there is an option to walk the trail from the top end. It seems quite pleasant to take that wide entry path, however the Wildlife Sculpture Trail itself has a steep narrow pathway and lots of steps in any case).
There are metal benches near marker post 6. Several paths meet in this area. (Red route meets blue route and there is also an entry path to the Elleray Wood Wildlife Sculpture Trail).
From marker post 7 up to a marker post 9 (red route)
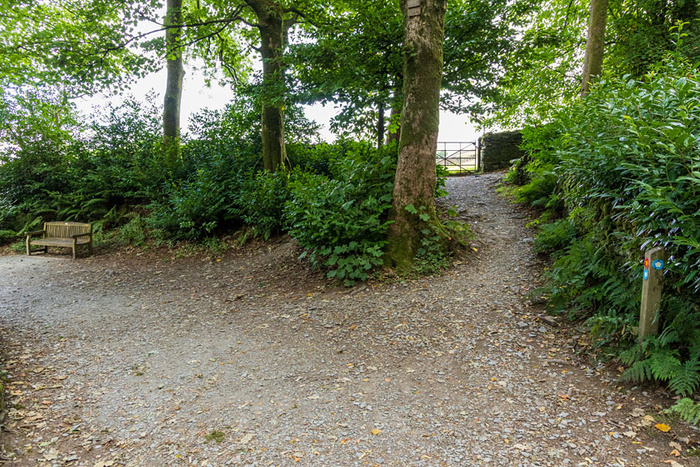
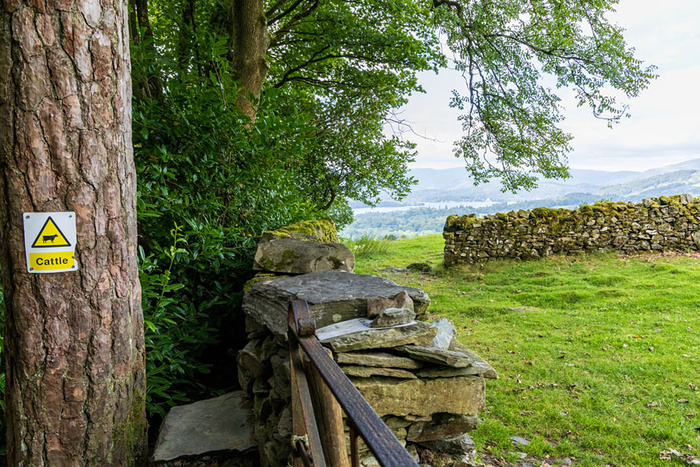
Marker post 7 is on the right of this picture. The red route path (up to a marker post 9) turns right just before the gate and goes uphill by the wall. (The bench in this image is on the blue route path that comes uphill from marker post 6. The blue route path continues off the bottom of this image so as to go up to signpost 8).
The red route path goes uphill then turns right just before the gate and continues to go uphill. From the gate, there is a view available of the lake. The route does not go through the gate.
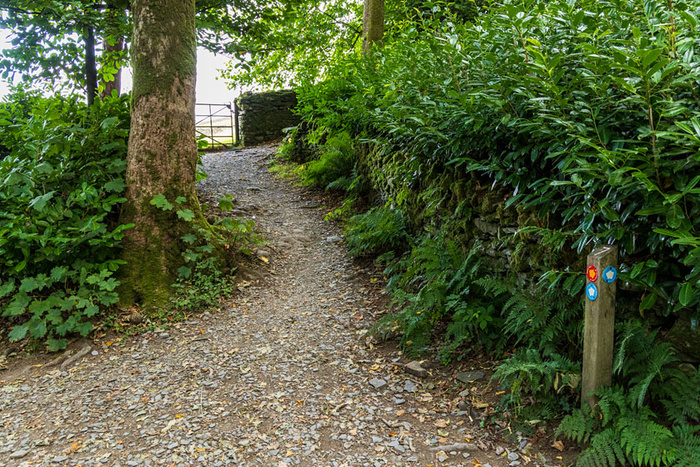
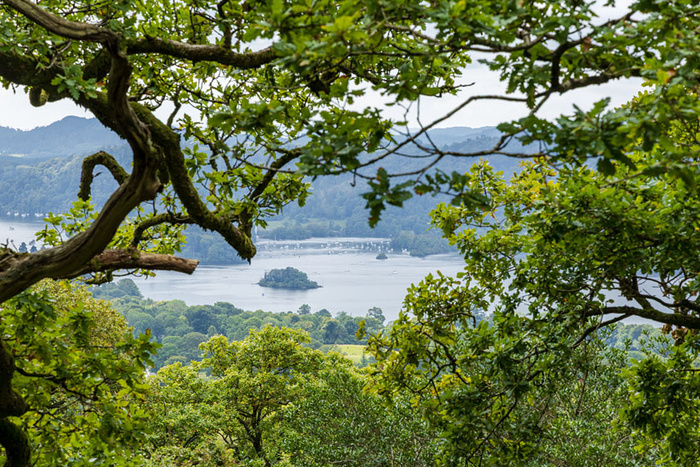
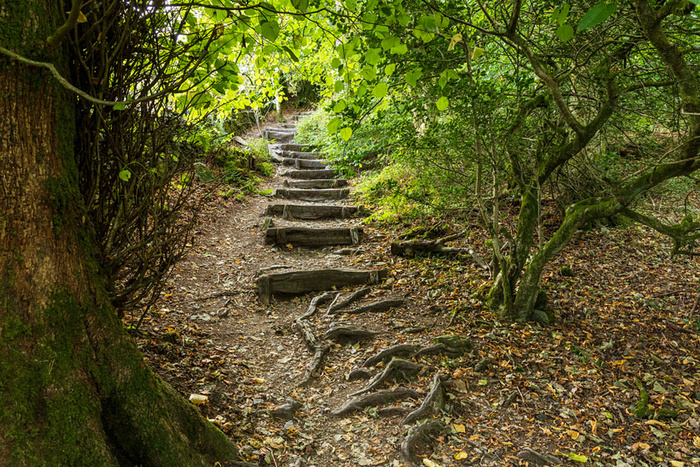
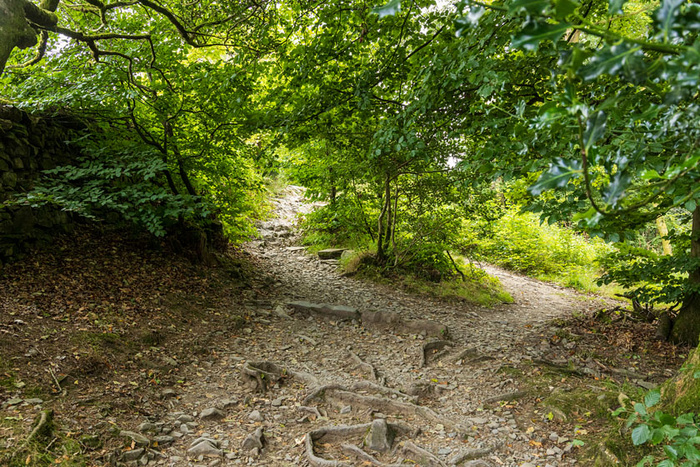
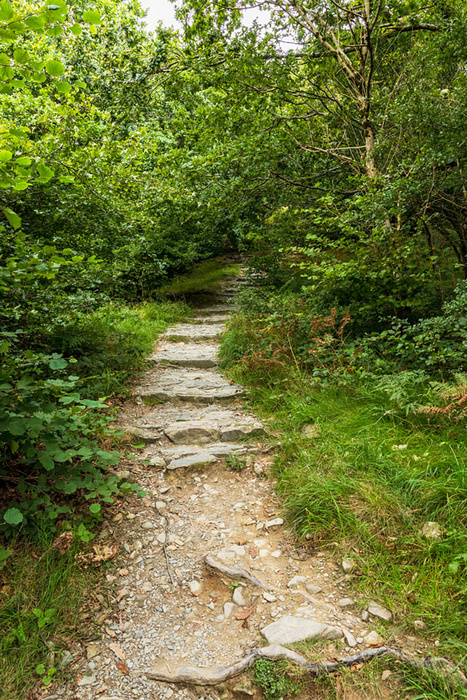
On the red route, looking uphill from near the gate. There are tree roots across the path and higher up there are steps. There is a picturesque view of the lake available from near the gate.
A glimpse of Windermere from the red route path. The path does not go through the gate.
Looking over the gate to appreciate the serene view of the lake.

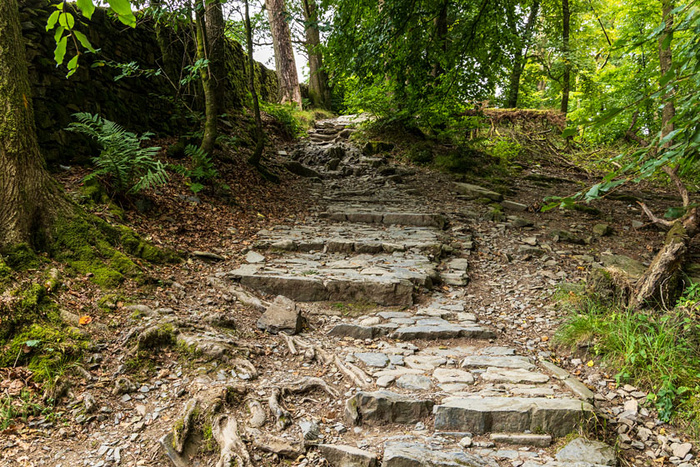
The red route is steep and has steps and there are tree roots in places.
Looking back in a downhill direction towards the lake, having walked up from marker post 7 to a marker post 9 via the red route. (To capture this image, I am standing on the blue route).
A marker post 9 up to marker post 10 (red route)
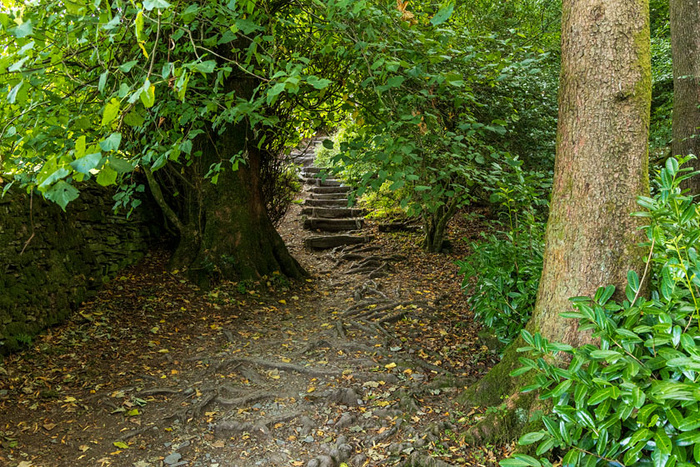
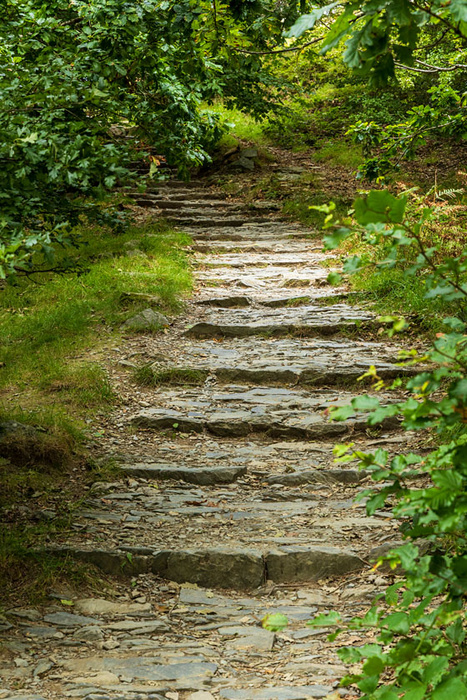
The red route goes uphill between the trees. There are lots of tree roots; there are steps and then at the top of the stretch there is rocky ground.
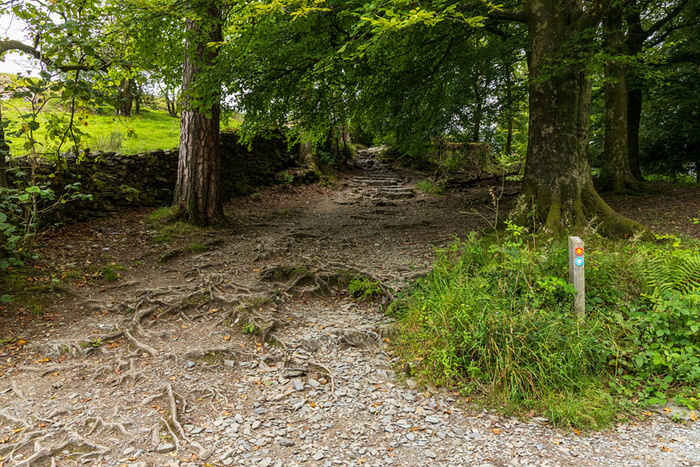
Rocky ground at the top of the stretch. The red route meets the blue route here; the blue route gravel path curves around from the right and continues its way up towards the summit.
Looking back downhill, over the wall at the side of the red route. Windermere can be seen through the tree branches.
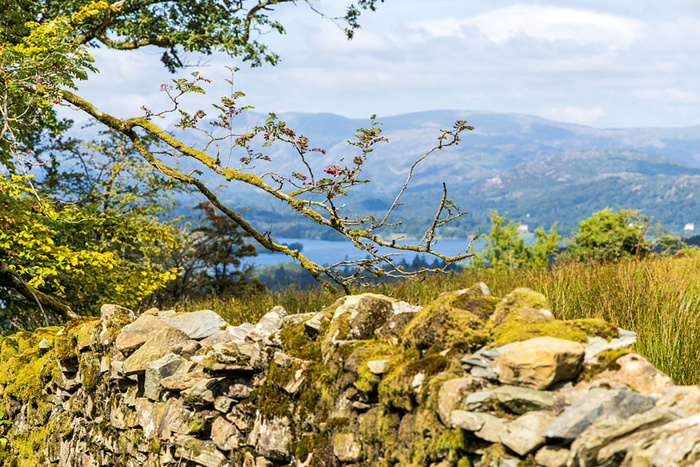
Another view looking over the wall, this time from a slightly different position so as to get a clearer view of Windermere. The Langdale Pikes can also be seen on this image.
Standing on the blue route in the area of marker post 10, while looking back downhill over the top of the red route.
From the kissing gate at marker post 11, up steps to the summit via red route
This option has tree roots, lots of steps and a rocky ascent to the summit area.
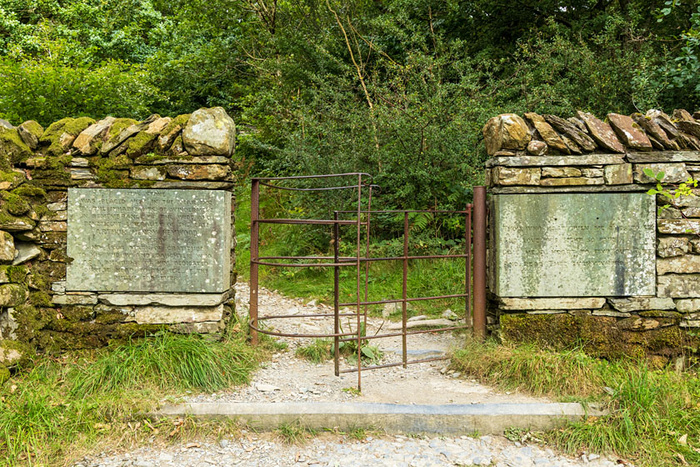
The kissing gate next to marker post 11. The inscribed stones in the wall are the Arthur Heywood memorial stones.
Looking up to the summit from the red route. It is a hot dry day and I am confident that I can reach the summit from here, however before I ascend the rocks I put my camera away in my rucksack so that I have both hands free. I have reached the summit this way several times now (I first ascended this way about fifteen years ago), however I prefer the blue route via marker post 12 (rather than going through the kissing gate at marker post 11 onto the red route).
Looking back down from the summit area to the area where the red route comes up.
Disclaimer:
Weather, lighting and ground conditions may vary. Fitness levels may vary. The inclusion of a walk does not guarantee a public right-of-way. Information on walks is given in good faith. Walks information is not professional advice so should not be taken to be such.
One of the walks I went on this summer was a short walk from Windermere railway station to the summit of Orrest Head. Orrest Head is a hill that was loved by explorer Alfred Wainwright.
On the walk there are glimpses of Windermere through the trees, then at the summit there are extensive views (weather permitting).
Some signage at the start of the walk, in an area by the side of the A591 near Windermere railway station.
This board shows various routes to the summit.
The blue route is the “Miles Without Stiles” route. I saw people with a pushchair at the summit, however I did not see any wheelchairs up there. All the routes have steep sections, even the Miles Without Stiles (blue) route, although the blue route has gentler inclines than the other routes.
There is a section marked grey on the map (from the start of the walk up to signpost 8); I am accustomed to incorporating this grey section into my walk because it was the way that I chose when I first walked up to Orrest Head about fifteen years ago. The blue route with the more recent additions does make for a leisurely meander through the woods though.
The red routes incorporate steep sections and steps. The red routes were relatively busy when I walked them on a summer’s afternoon this year, however some people were indicating that the red route was tiring for them.
There are so many route combinations possible (subject to suitability such as weather conditions) that showing all the routes in depth pictorially would make for a very lengthy blogpost, so I will be concentrating on showing some scenic parts of the routes and trying to illustrate some of the character of the area. I visited on a hot dry day when I was happy to try all sections.
This is not a walking guide and I have not shown all sections.
The blue route (gravel path) between signpost 4 and marker post 6
In this area, which is in the vicinity of signpost 4 (the signpost is off to the left side of this image, not shown on the image), I have been accustomed to continuing to walk on the Restricted Access road (which curves to the right uphill in the lower right of this image) i.e. I usually take the grey route. Now however, there is the option of taking a gravel path blue route leading from near signpost 4 to marker post 6; the blue route can eventually lead to the summit, however it is a leisurely and meandering way to get there. The gravel path is initially approximately level but actually goes downhill before it reaches marker post 6, then the blue route path to the summit goes uphill from marker post 6.
On the blue route gravel path between signpost 4 and marker post 6.
On the blue route.
I was impressed by the grandeur of the tall trees on this stretch of the blue route.
Several paths meet in the area by marker post 6. Off the bottom left of the image is the red route which comes uphill from near the start of the walk. There are two benches; people who have walked up the steep path from signpost 5 seem especially happy to sit on the benches. Looking ahead, there are two path entrances next to each other (in the top half of the image); the path entrance on the left is for the Wildlife Sculpture Trail whereas the path entrance on the right is for the blue route that leads uphill to marker post 7 and then continues to the summit.
Around signpost 8
Halfway up the hill is signpost 8. It is a popular place for people to rest before they continue their walk; there are several benches in the area and there is also map signage. There is a lovely view of the lake through the trees.
A view from near signpost 8 which is halfway up the hill between the start of the walk and the summit.
There may be some wooden sculptures visible in the area near signpost 8. (The area designated as the Wildlife Sculpture Trail / red squirrel conservation area, however, is near marker post 6; I have been preparing photographs of that area towards a future blogpost).
There may be some refreshments available to purchase in the area near signpost 8, subject to opening times etc.
It seems great that next to the railway station, near the start of the walk, there is a Booths store which appears to have convenient opening times, a wide range of food to purchase and also has many tourist information leaflets. Windermere Tourist Information Centre (next to Booths) also has many tourist information leaflets.
On the day of my walk from near Windermere railway station to Orrest Head this summer, I also walked down to Broad Street in Windermere town and then back up to the railway station. There is a car park at Broad Street and there are some toilets there too. It took me less than ten minutes to walk up from Broad Street to the railway station.
The grey route option from signpost 4 up to signpost 8
I am accustomed to walking the grey route, however there is now a blue route available and the signposts no longer point to the grey route between signpost 4 and signpost 8.
Reaching signpost 4 after walking uphill on the blue/grey route. The grey route goes uphill from here; the Restricted Access road curves round to the right, coming off the middle right of the picture.
On the grey route between signpost 4 and signpost 8, there are some bends that seem like chicanes. The Restricted Access road ascends quickly; the route is narrow and the bends here are tight. This image is a view looking back downhill after I had just walked uphill from signpost 4 which is just visible in the distance.
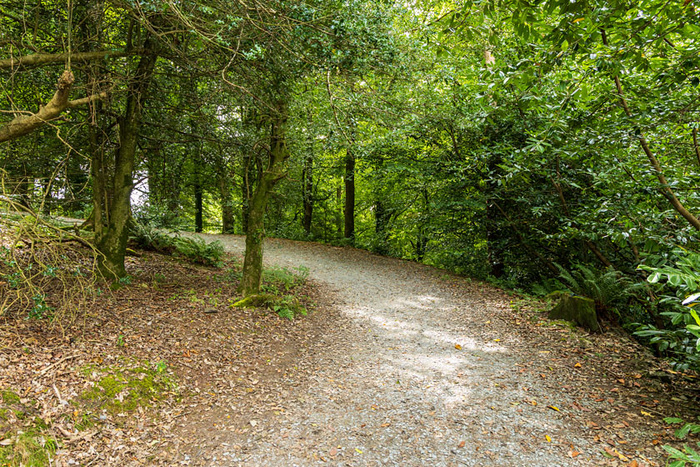
The grey route passes Elleray Wood Cottage and the blacksmith’s studio and winds its way up towards signpost 8.
A stretch of the grey route, shortly before reaching signpost 8.
From near signpost 8 to the marker posts 9 then up to marker post 10, via the blue route
After passing by signpost 8, I walk further uphill, on the path to the left of the posts in this image. I am glad that a path has been laid here (rather than having to find a way across tree roots).
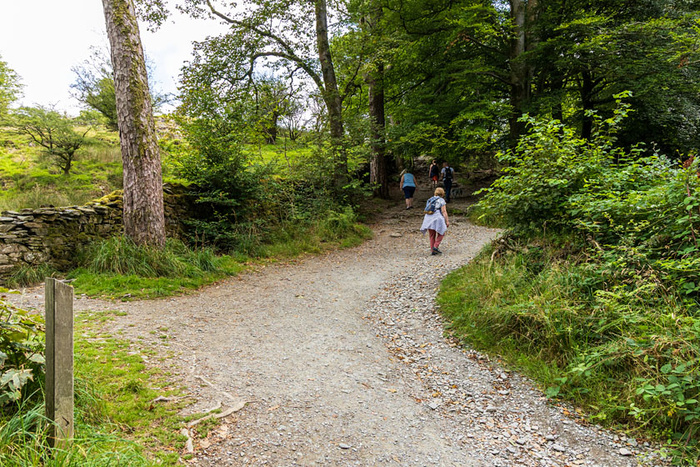
The blue route curves around to the right as it continues weaving its way uphill. Coming off the blue route path in this area are two red routes: a red route goes downhill from 9 to 7 off the left of the picture, while a red route goes uphill from 9 to 10 (three people in the shade here are walking on the red route between 9 and 10). The marker post on the left is one of the marker posts marked 9; there is another marker post (also marked 9 but not included in this image) just around the curve to the right.
Reaching marker post 10. The blue route path curves to the right to continue going uphill. (Marker post 10 is visible on the left of this picture; the post indicates a choice of routes for anyone walking downhill. When looking over the stone wall to the side of the red route, views looking across Windermere [including part of the lake and distant fells] can be observed; I show some of the images later in this blogpost).
From the metal bench near marker post 10, up to marker post 11
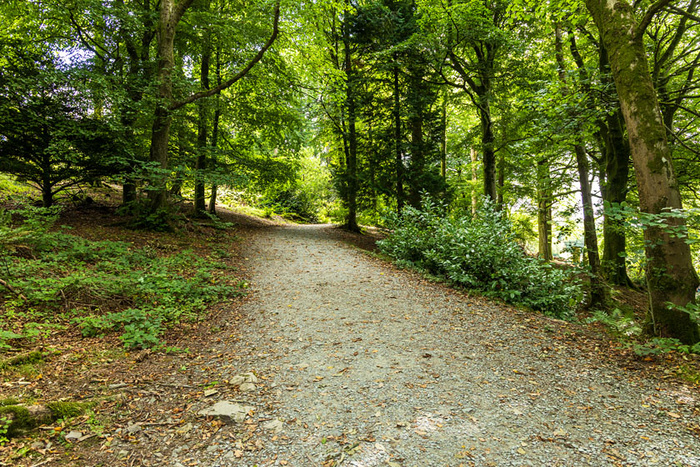
Looking uphill from marker post 10, with the path stretching ahead into the distance. This path is a blue route; I consider that the path allows for a pleasant walk up to the summit from here. The incline seems quite gentle and there are benches by the side of the path.
The blue route continues straight on up the hill here, via the gravel path which has a gentle incline (right-hand side of the picture). There is a wooden sign which says “Accessible route to the summit”. (An alternative route is available, a steep red route, by walking through the kissing gate on the left and climbing a multitude of steps and ascending a rocky area to the summit. This alternative route is shown at the end of this blogpost).
From marker post 11 to the summit approach
Marker post 11 is next to the metal bench, on the left of this image.
From near marker post 11, a view of Windermere can be seen through the trees.
Continuing on the blue route that leads gently uphill to the summit.
Marker post 12 is on the right of the path. The path curves round and gently winds its way towards the summit. It is not far to the summit from here.
Approaching the summit which is just in sight ahead.
The summit area
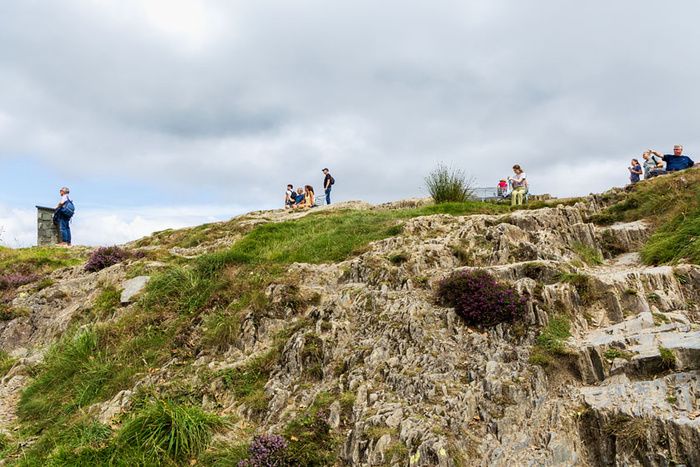
There were lots of people sitting and standing around at the summit on this occasion so I couldn’t capture a photograph of the summit seating area without people. I was able to capture scenic views in all directions, although the conditions looked a little hazy in the distance.
Walking down the blue route path after leaving the summit
The next images are after I left the summit. (I noticed the views through the trees more on the way down).
THE RED ROUTES
Signpost 1 to signpost 5 then up to marker post 6
The path on the left is the red route from signpost 1. The weather is hot and sunny; the path soon goes into shade. It is quite a busy route (I saw lots of walkers, many with dogs) although I found it quite dark.
Signpost 5 is on the left of the image, near the wall. I turn right at the signpost so as to continue on the red route. The red route gets steeper from this point; the path from signpost 5 up to marker post 6 is quite steep.
Signpost 5 indicates the route for Orrest Head so that walkers know where to turn for the route up the hill.
People/families with dogs seemed to be taking this route in their stride and it seems probable that those people go walking outdoors a lot, however people without dogs were indicating that they found the uphill walking on this red route to be tiring.
An entry/exit point to the Elleray Wood Wildlife Sculpture Trail can be seen at the side of the red route path between signpost 5 and marker post 6. The sculpture trail is steep and narrow and has steps. (There is a wider entry path a little bit higher up at marker post 6 so there is an option to walk the trail from the top end. It seems quite pleasant to take that wide entry path, however the Wildlife Sculpture Trail itself has a steep narrow pathway and lots of steps in any case).
There are metal benches near marker post 6. Several paths meet in this area. (Red route meets blue route and there is also an entry path to the Elleray Wood Wildlife Sculpture Trail).
From marker post 7 up to a marker post 9 (red route)
Marker post 7 is on the right of this picture. The red route path (up to a marker post 9) turns right just before the gate and goes uphill by the wall. (The bench in this image is on the blue route path that comes uphill from marker post 6. The blue route path continues off the bottom of this image so as to go up to signpost 8).
The red route path goes uphill then turns right just before the gate and continues to go uphill. From the gate, there is a view available of the lake. The route does not go through the gate.
On the red route, looking uphill from near the gate. There are tree roots across the path and higher up there are steps. There is a picturesque view of the lake available from near the gate.
A glimpse of Windermere from the red route path. The path does not go through the gate.
Looking over the gate to appreciate the serene view of the lake.
The red route is steep and has steps and there are tree roots in places.
Looking back in a downhill direction towards the lake, having walked up from marker post 7 to a marker post 9 via the red route. (To capture this image, I am standing on the blue route).
A marker post 9 up to marker post 10 (red route)
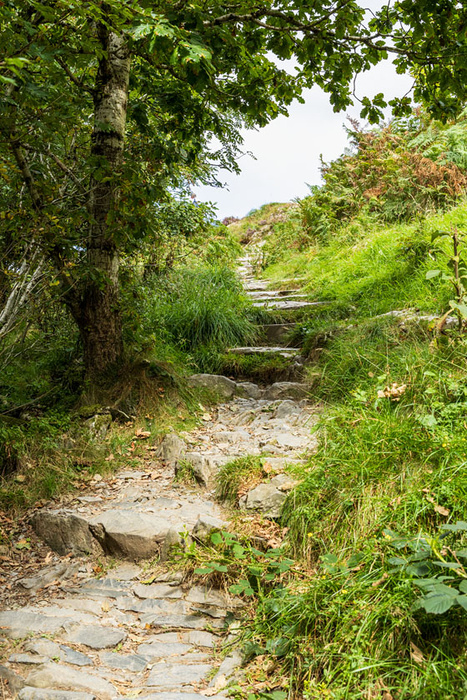
The red route goes uphill between the trees. There are lots of tree roots; there are steps and then at the top of the stretch there is rocky ground.
Rocky ground at the top of the stretch. The red route meets the blue route here; the blue route gravel path curves around from the right and continues its way up towards the summit.
Looking back downhill, over the wall at the side of the red route. Windermere can be seen through the tree branches.
Another view looking over the wall, this time from a slightly different position so as to get a clearer view of Windermere. The Langdale Pikes can also be seen on this image.
Standing on the blue route in the area of marker post 10, while looking back downhill over the top of the red route.
From the kissing gate at marker post 11, up steps to the summit via red route
This option has tree roots, lots of steps and a rocky ascent to the summit area.
The kissing gate next to marker post 11. The inscribed stones in the wall are the Arthur Heywood memorial stones.
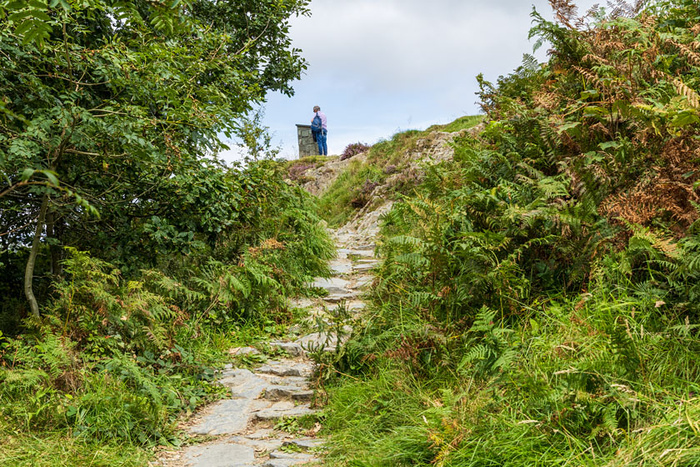
Looking up to the summit from the red route. It is a hot dry day and I am confident that I can reach the summit from here, however before I ascend the rocks I put my camera away in my rucksack so that I have both hands free. I have reached the summit this way several times now (I first ascended this way about fifteen years ago), however I prefer the blue route via marker post 12 (rather than going through the kissing gate at marker post 11 onto the red route).
Looking back down from the summit area to the area where the red route comes up.
Disclaimer:
Weather, lighting and ground conditions may vary. Fitness levels may vary. The inclusion of a walk does not guarantee a public right-of-way. Information on walks is given in good faith. Walks information is not professional advice so should not be taken to be such.